IMOU Life App Installation Guide
for QCWxx-AU Bookshelf Cameras

Congratulations on your purchase of a new Q-See “QCW” model wireless home security device. As part of the setup process you will need to download and install the IMOU Life app and configure it to access your new QCW equipment.
These instructions suite QCW2MP1PT-AU and QCW4MP1PT-AU models.
To setup please:
1: Download and install the app
2: Register an account
3: Configure your device by wireless (or by Ethernet cable for QCW4MP1PT-AU)
4: Use your device.

Step 1 – On your mobile download the app “IMOU Life”

Android and iOS Q-See Plus Apps are here:


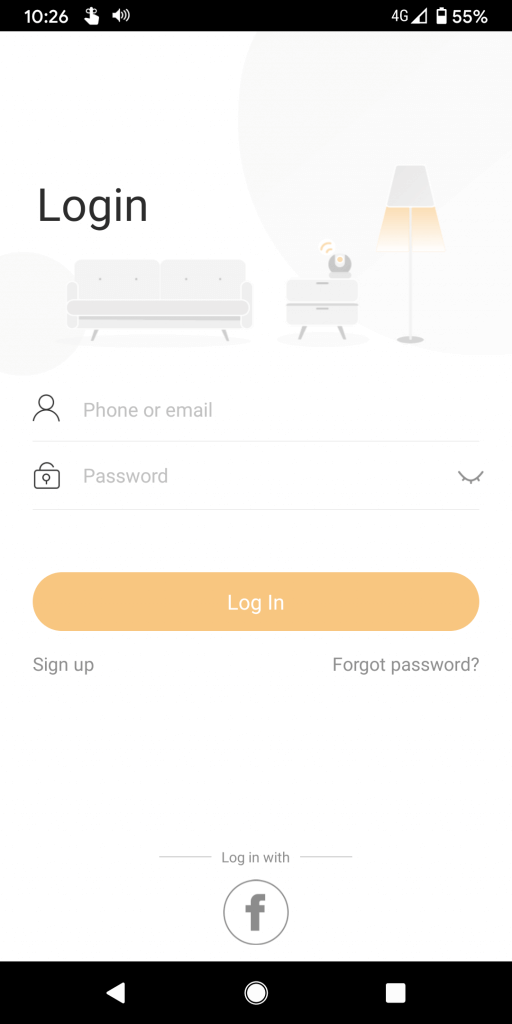
Step 2 – Register for a IMOU Life account
NOTE: The following screenshots are for Android. iPhone is the same process.
Step 2a: Select “Sign Up” from the IMOU Life app login page
Step 2b: Select region and click ‘next’

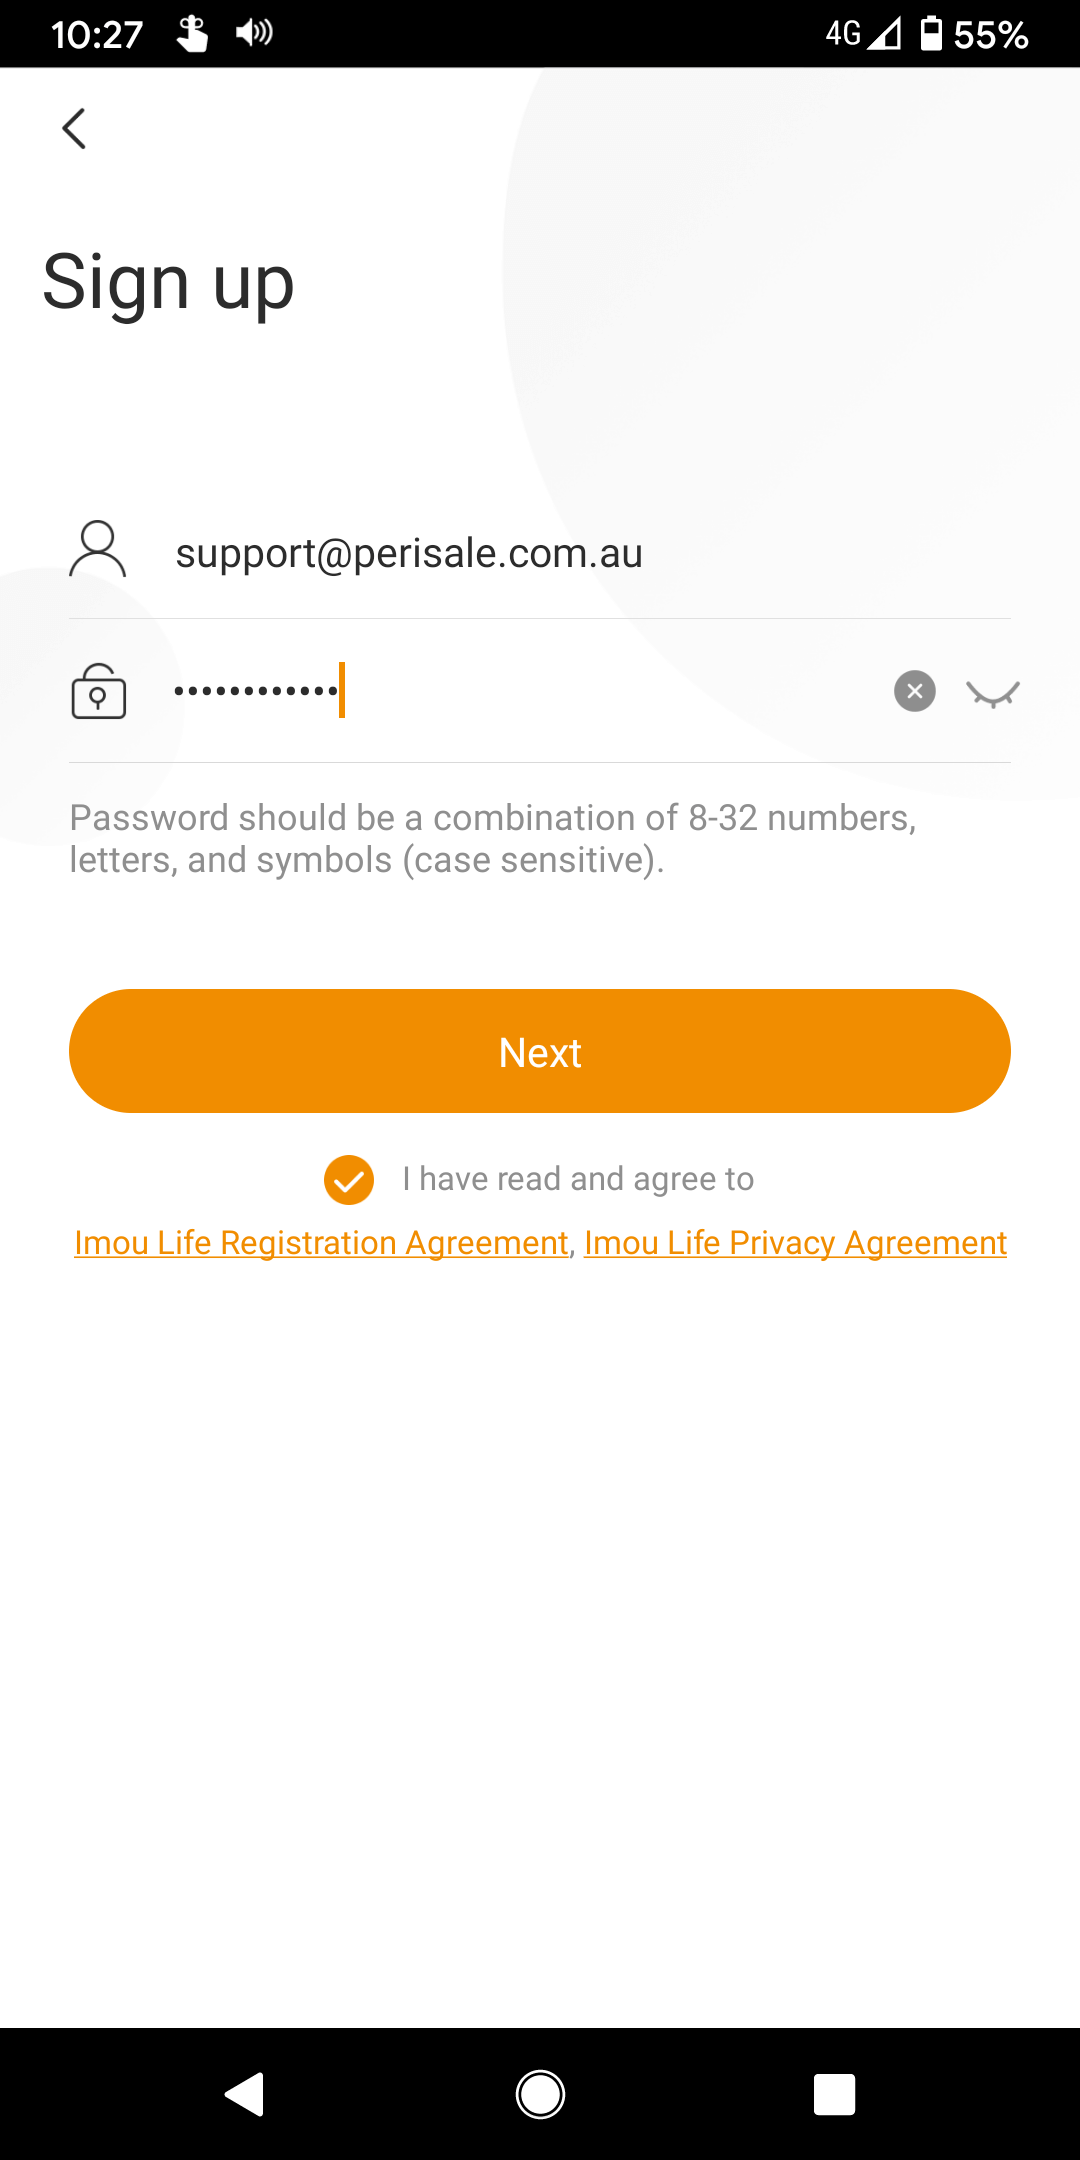
Step 2c: Sign up using your email and a password that is made up of 8-32 numbers/letters/symbols. Click ‘Next’
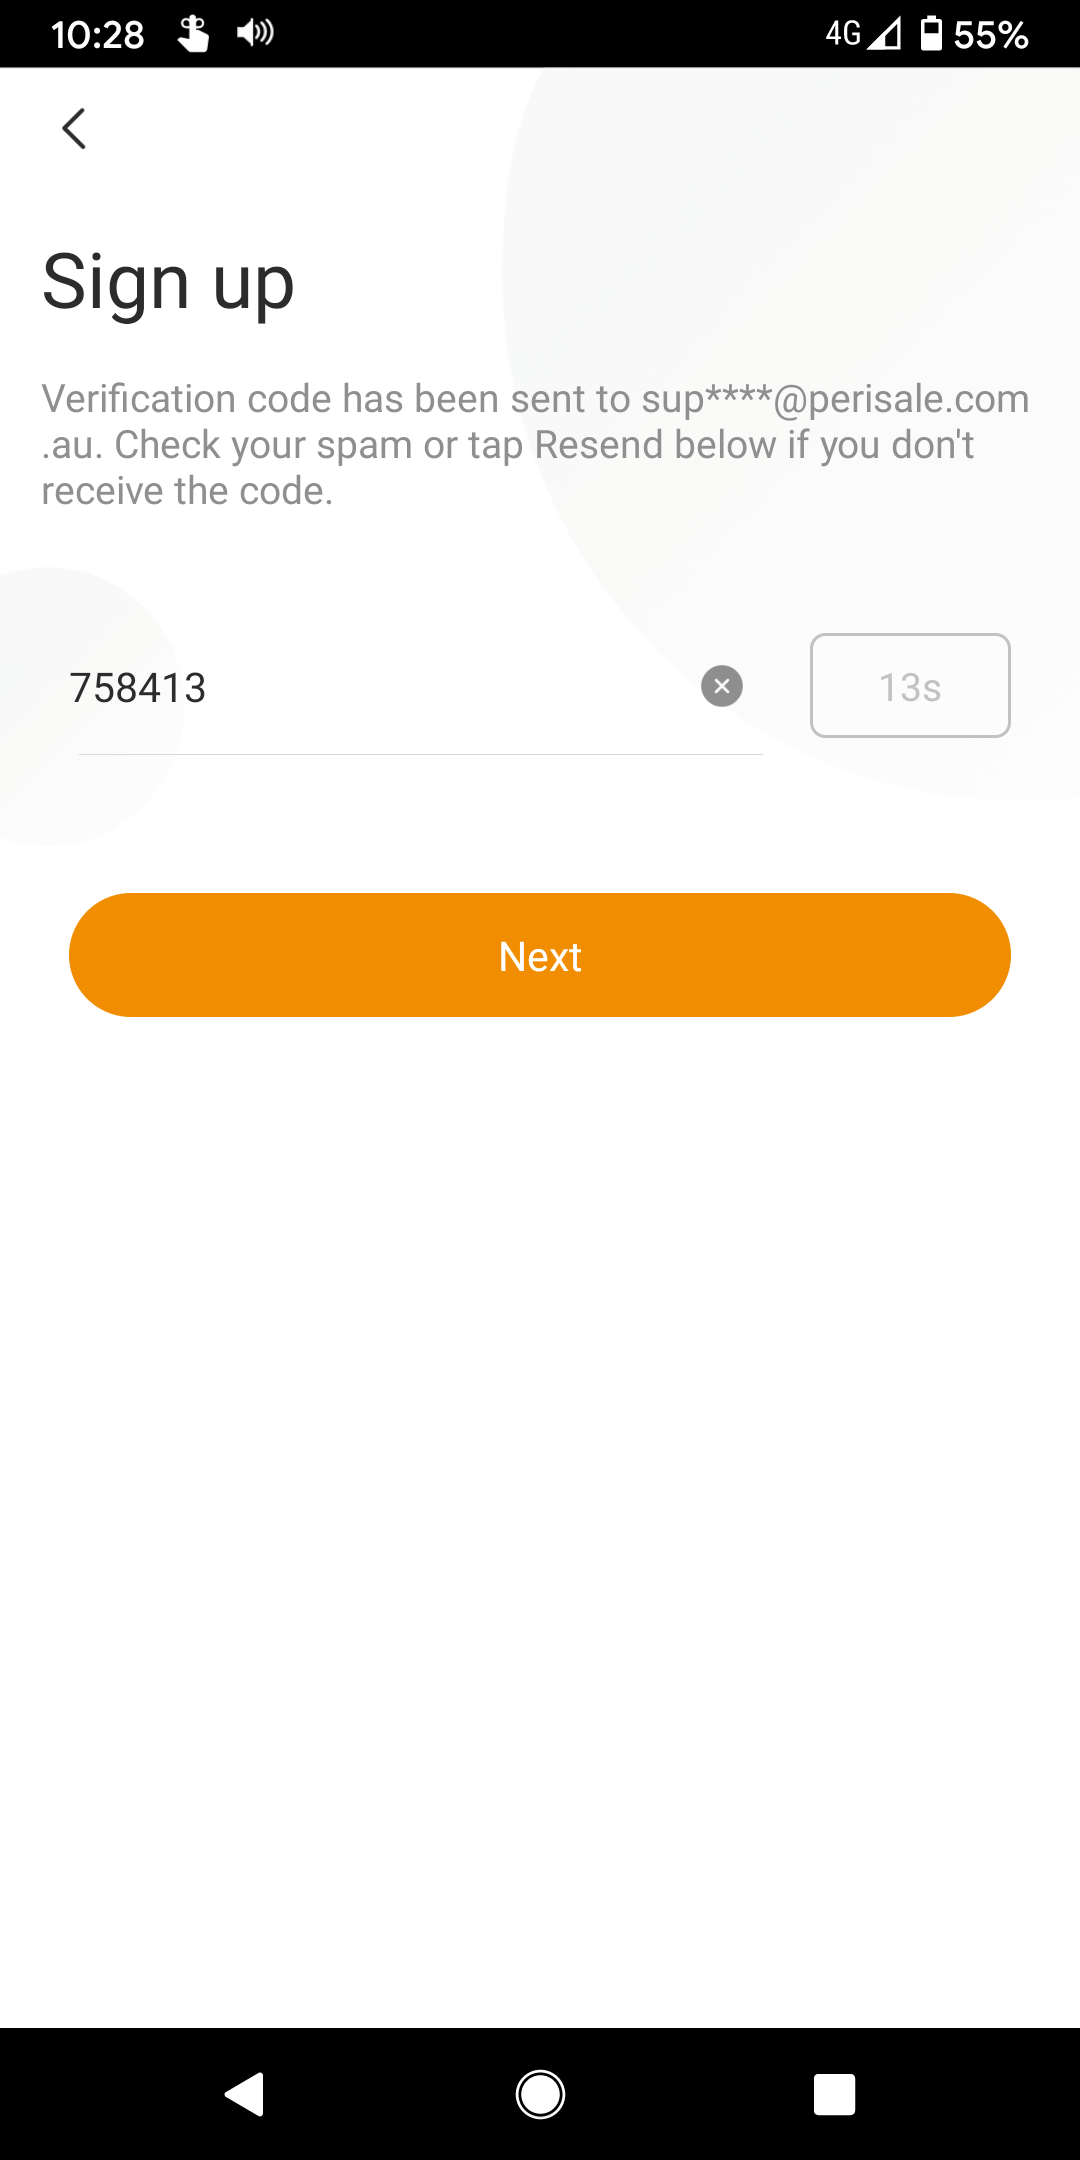
Step 2d: Check your email account and using the code sent enter the verification and click ‘Next’. This must be done within the timeout countdown. NOTE: Check your Junk/Spam folder if you dont see in your inbox.
Step 2e: Login using your newly created account

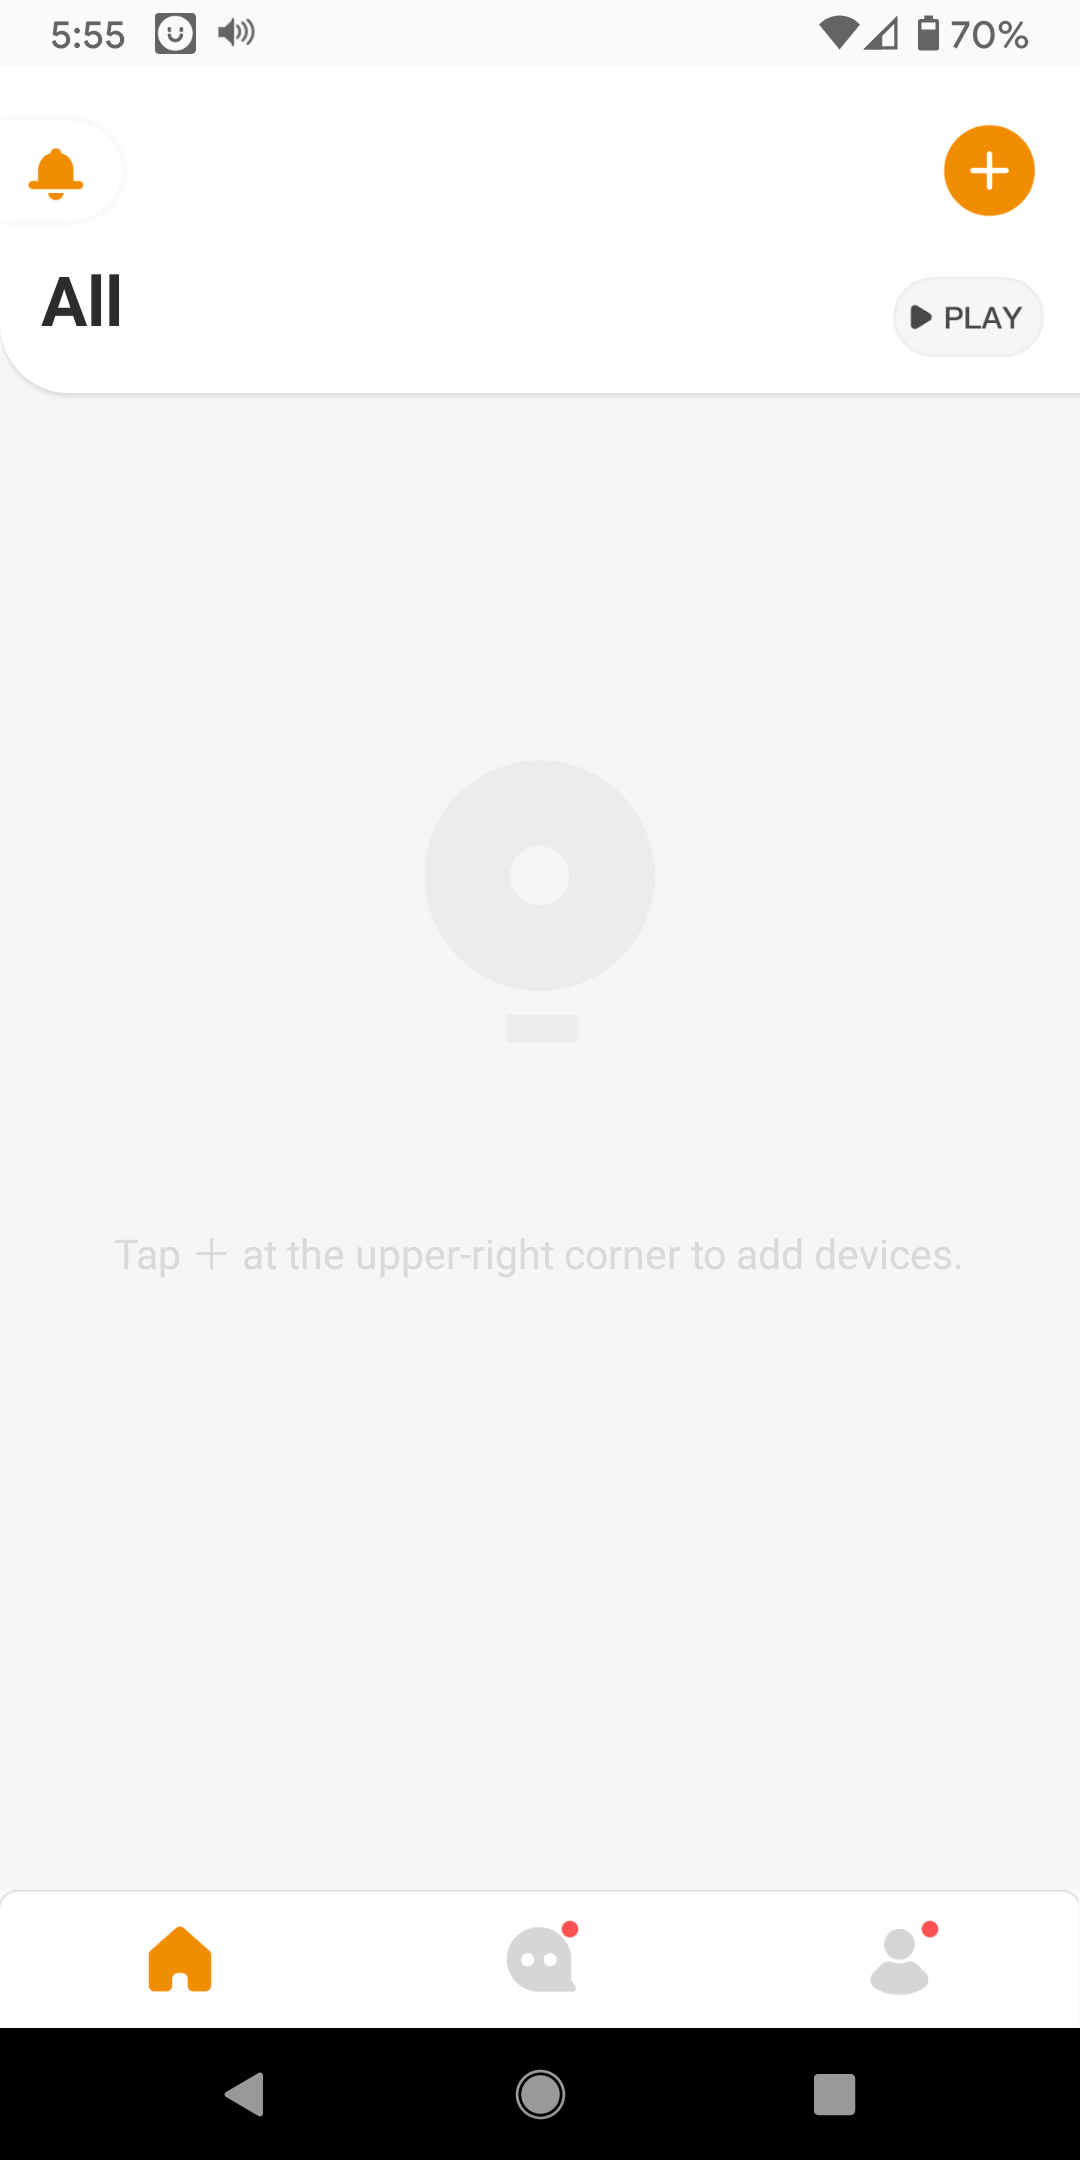
Step 3 – Add QCW device to IMOU Life app
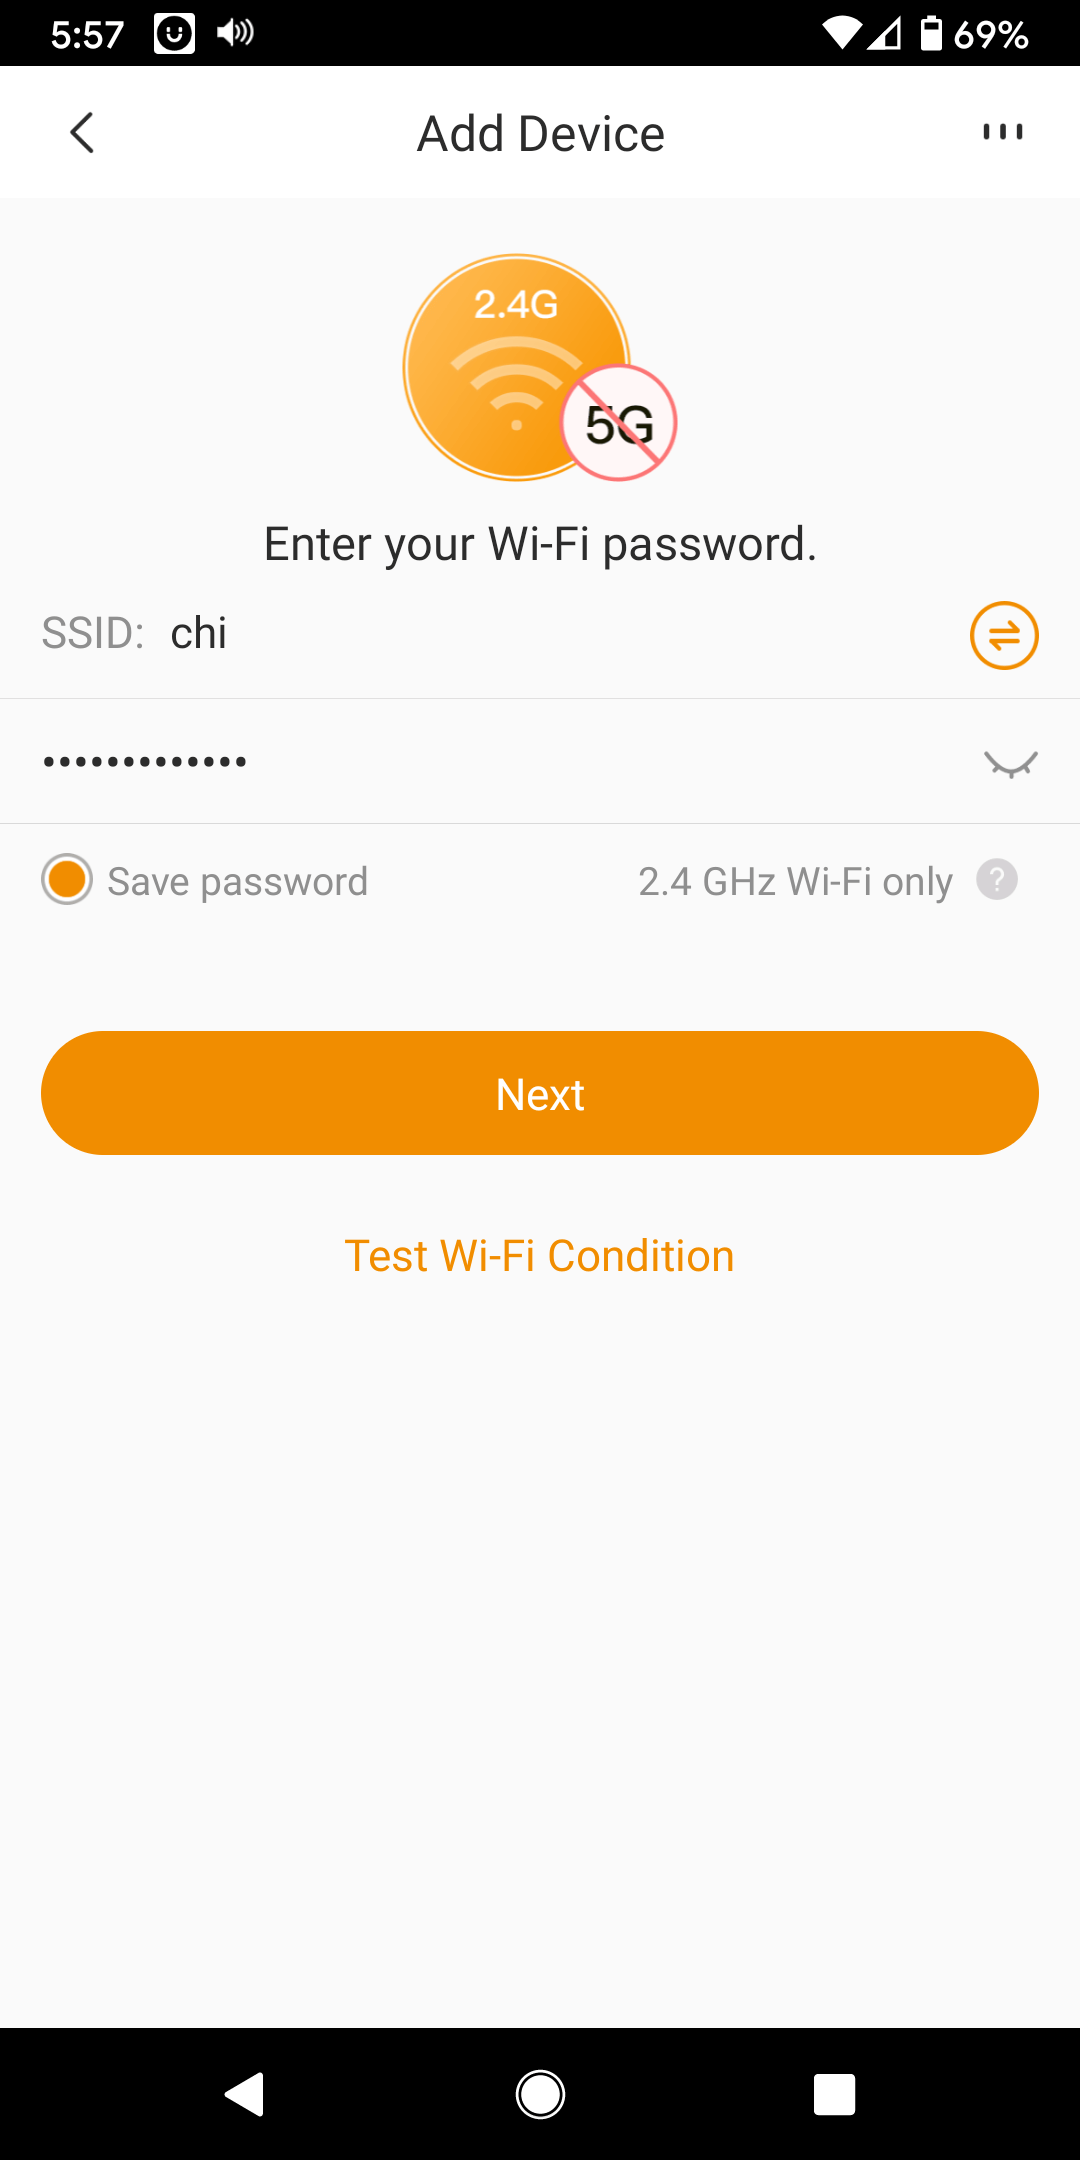
NOTE: Before you begin please connect your mobile device that you are using to the WiFi network that you wish your camera to operate on. This is typically your Home or Office WiFi network. It must be a 2.4GHz radio band compatible network. QCW cameras will not work on 5GHz WiFi as this is band is less able to penetrate walls and furniture.
Step 3a: Add new device by clicking the orange ‘+’ button
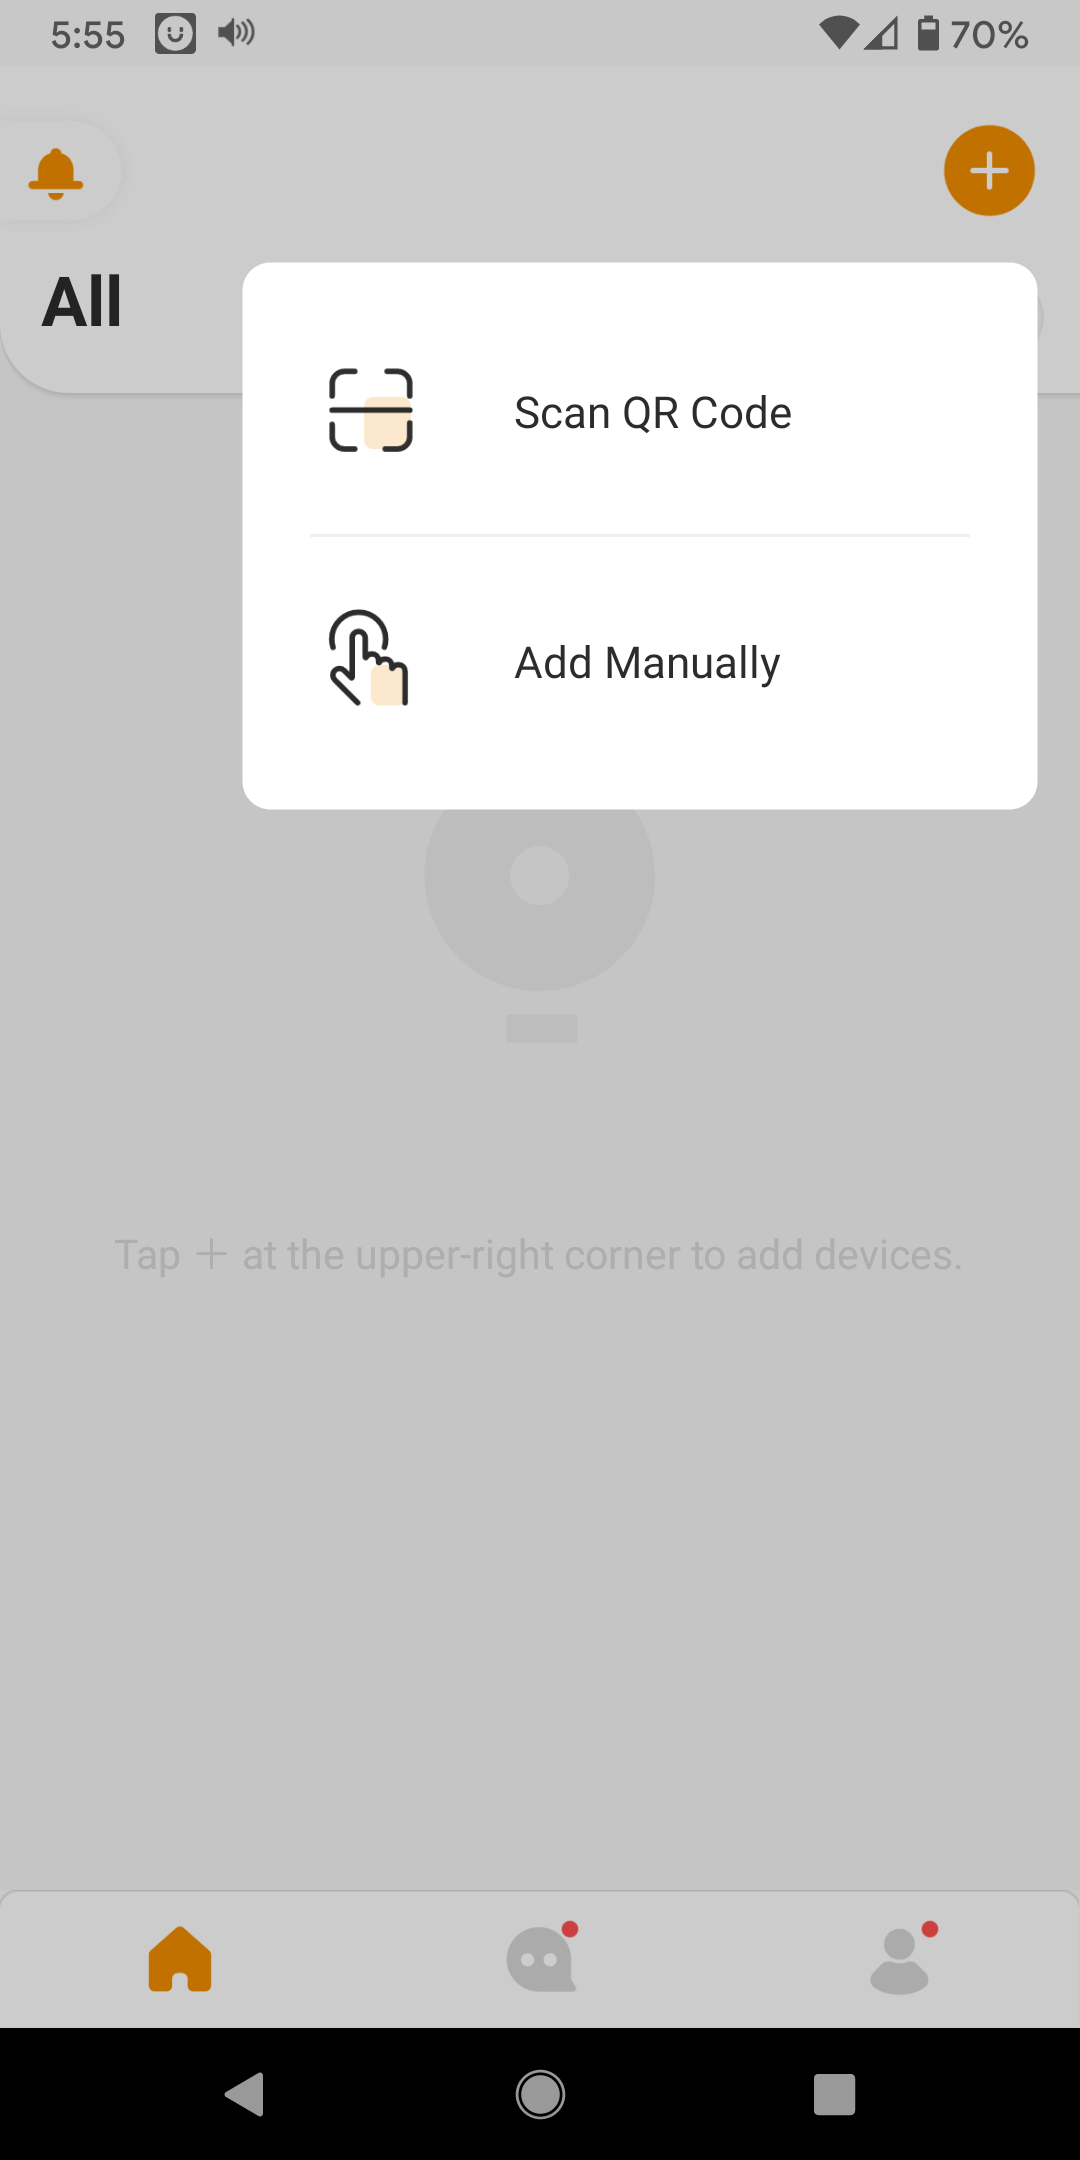
Step 3b: Typically choose to select by QR Code. (It is possible to manually enter the camera serial number also). Use your mobile camera to aim at the QR Code serial number on the bottom base of your camera.
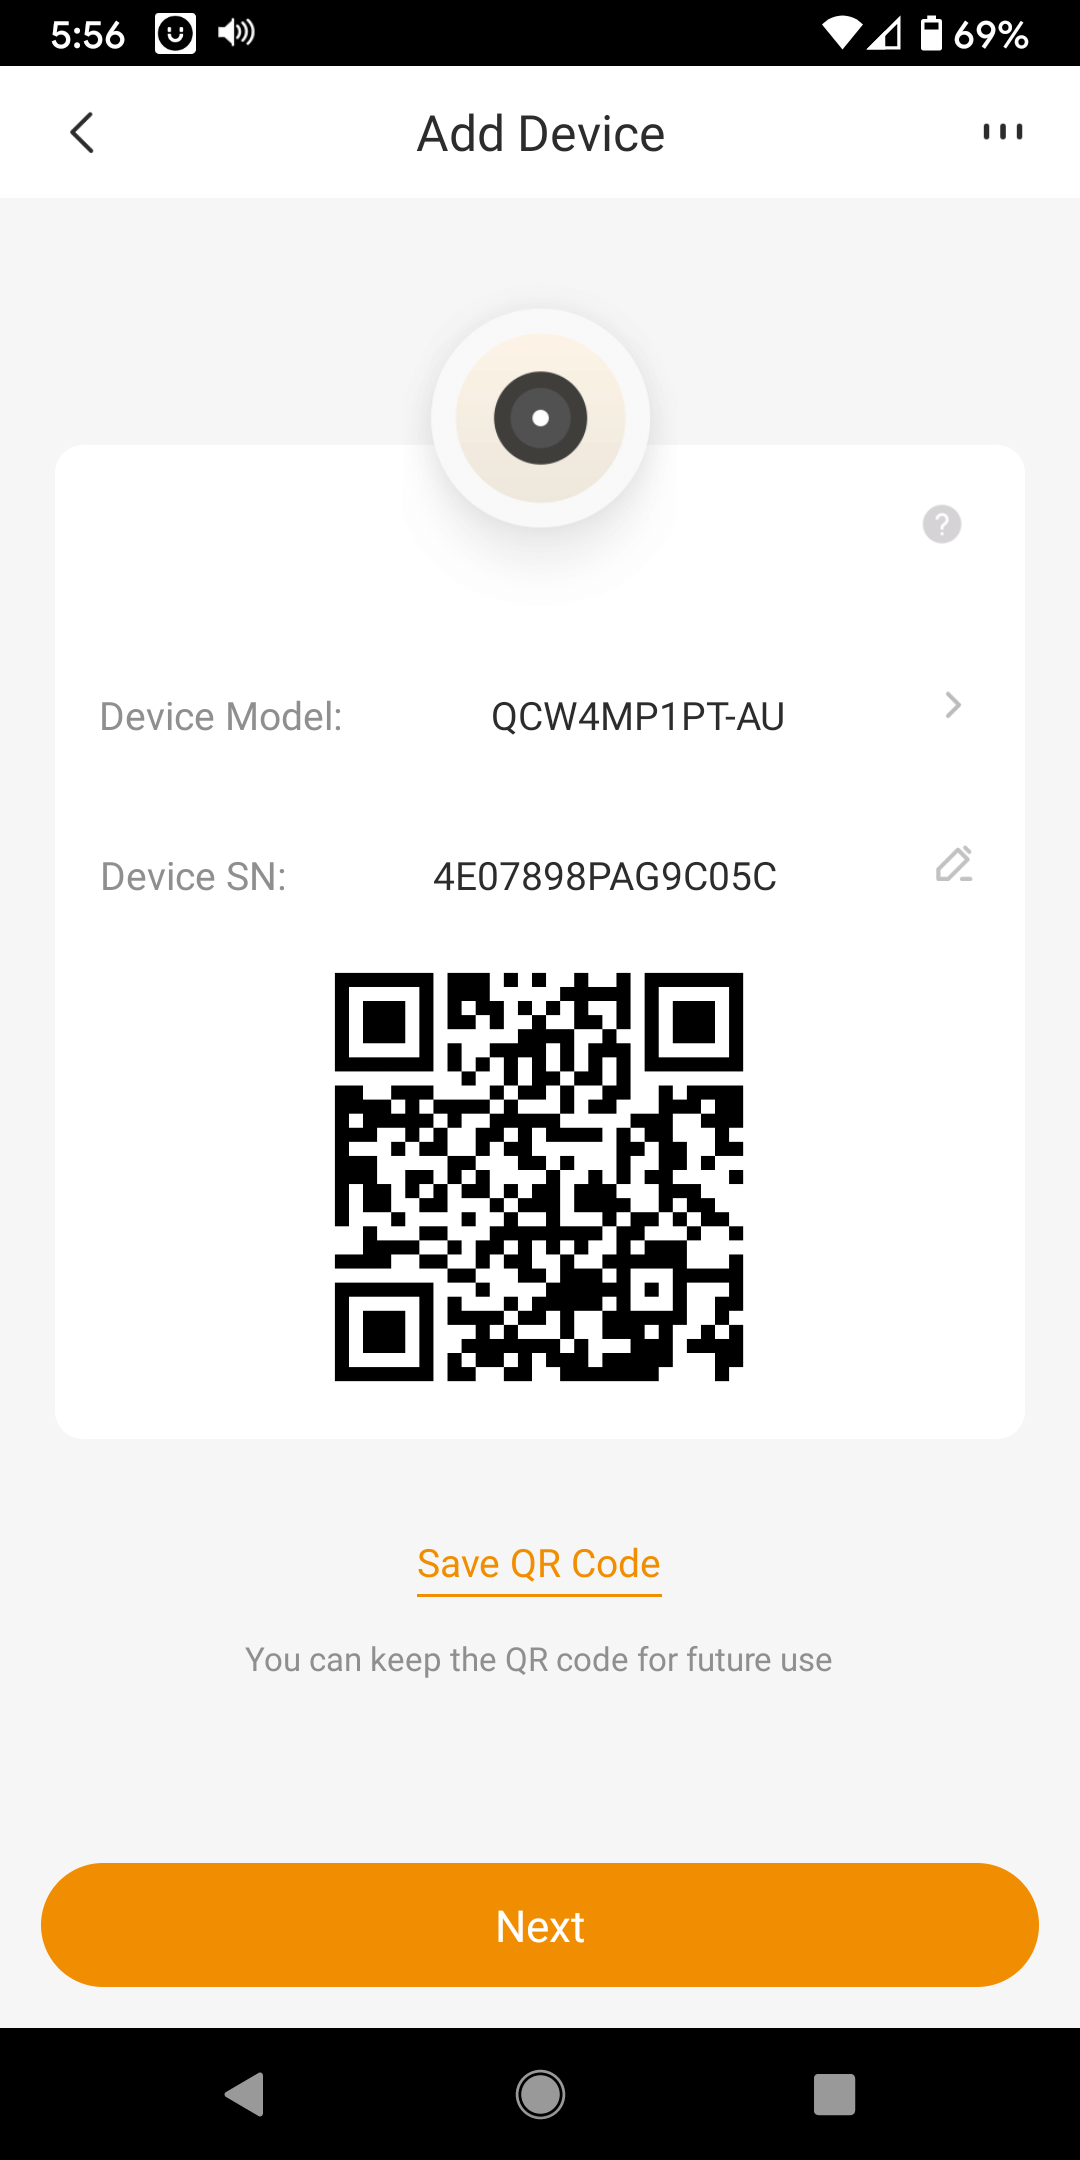
Step 3c: Select ‘Next’ after the QR Code is read and the serial number and device identified
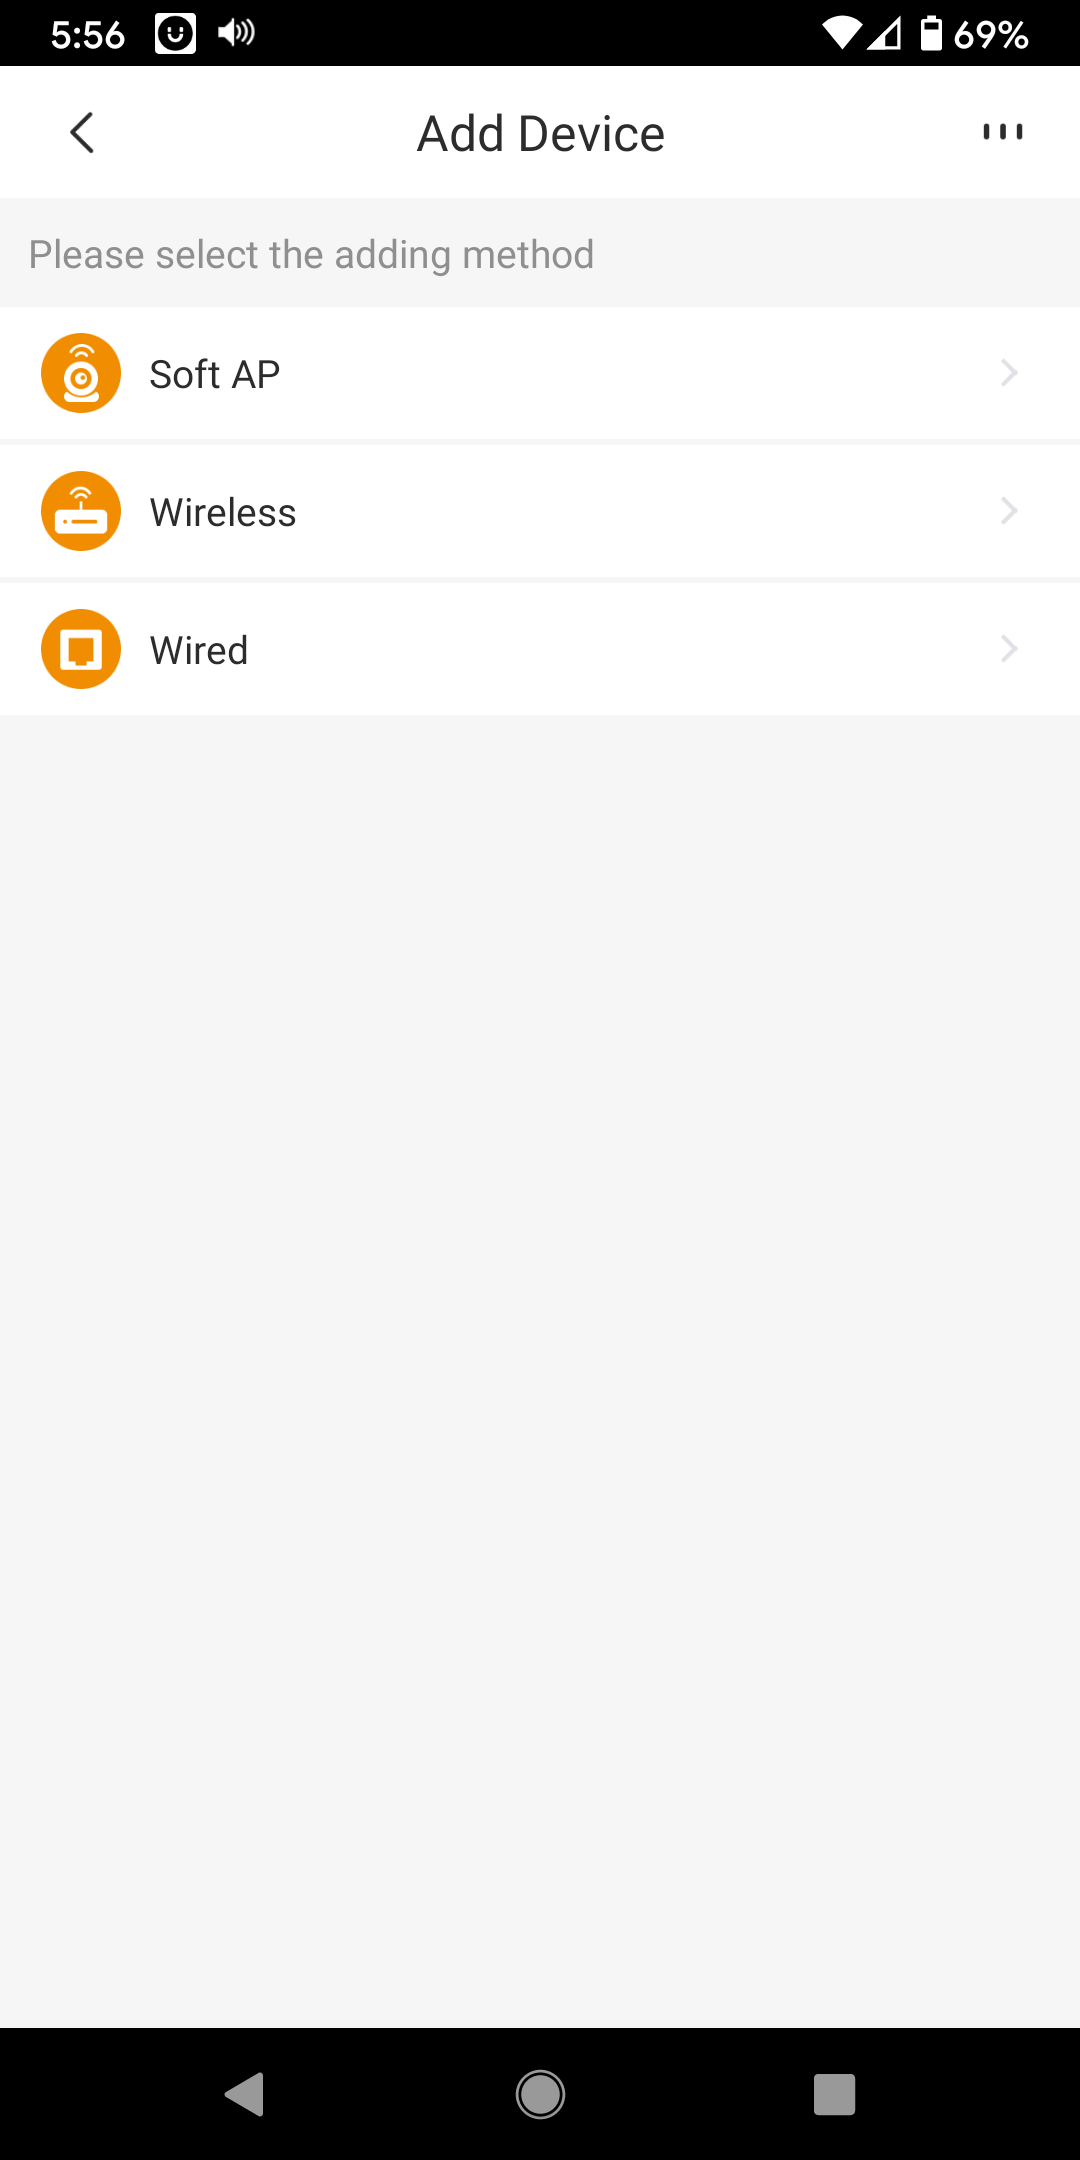
Step 3d: Select the preferred method to program the device. Usually select “Wireless”. QCW4MP1PT-AU users can also choose the “Wired” method if you are using an Ethernet cable and have the camera plugged into the same network as your home WiFi
Step 3e: Your mobile device MUST be connected on your home WiFi on a 2.4 GHz channel. Please enter your WiFi password here that matches the SSID. If the SSID is not your home 2.4GHz SSID then reconnect your mobile device iin its WiFi settings to the correct network before you do this step. Enter your password and select ‘Next’
NOTE: This stage is very important and where most errors occur. Do not try and connect to a 5GHz SSID. You may use the “Test Wi-Fi Condition” if unsure.
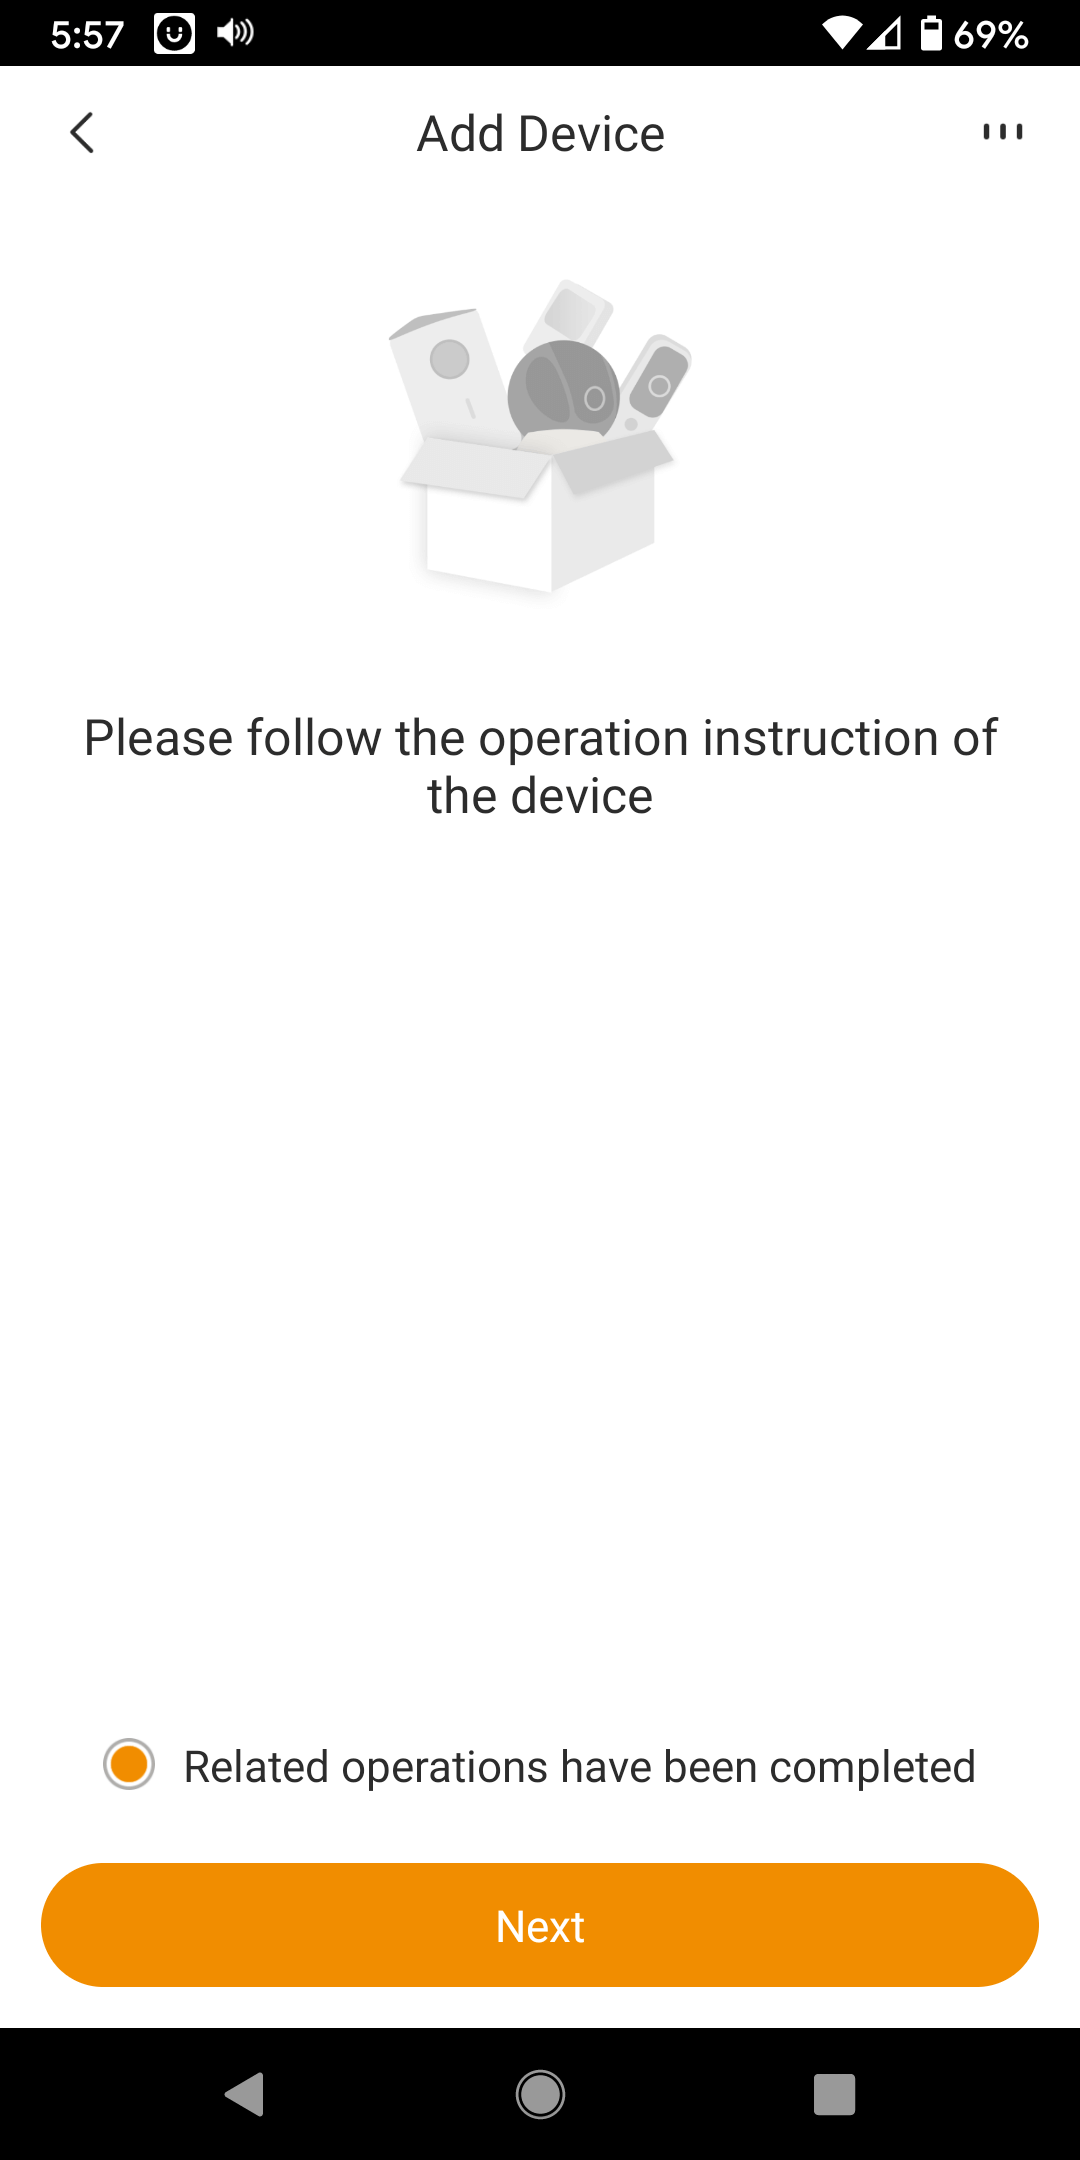
Step 3f: Select related operations are completed and click ‘Next’
Step 3g: Place your mobile device close to the camera. Turn up speaker volume. You will hear chirping as the app programs your camera with your home WiFi settings.
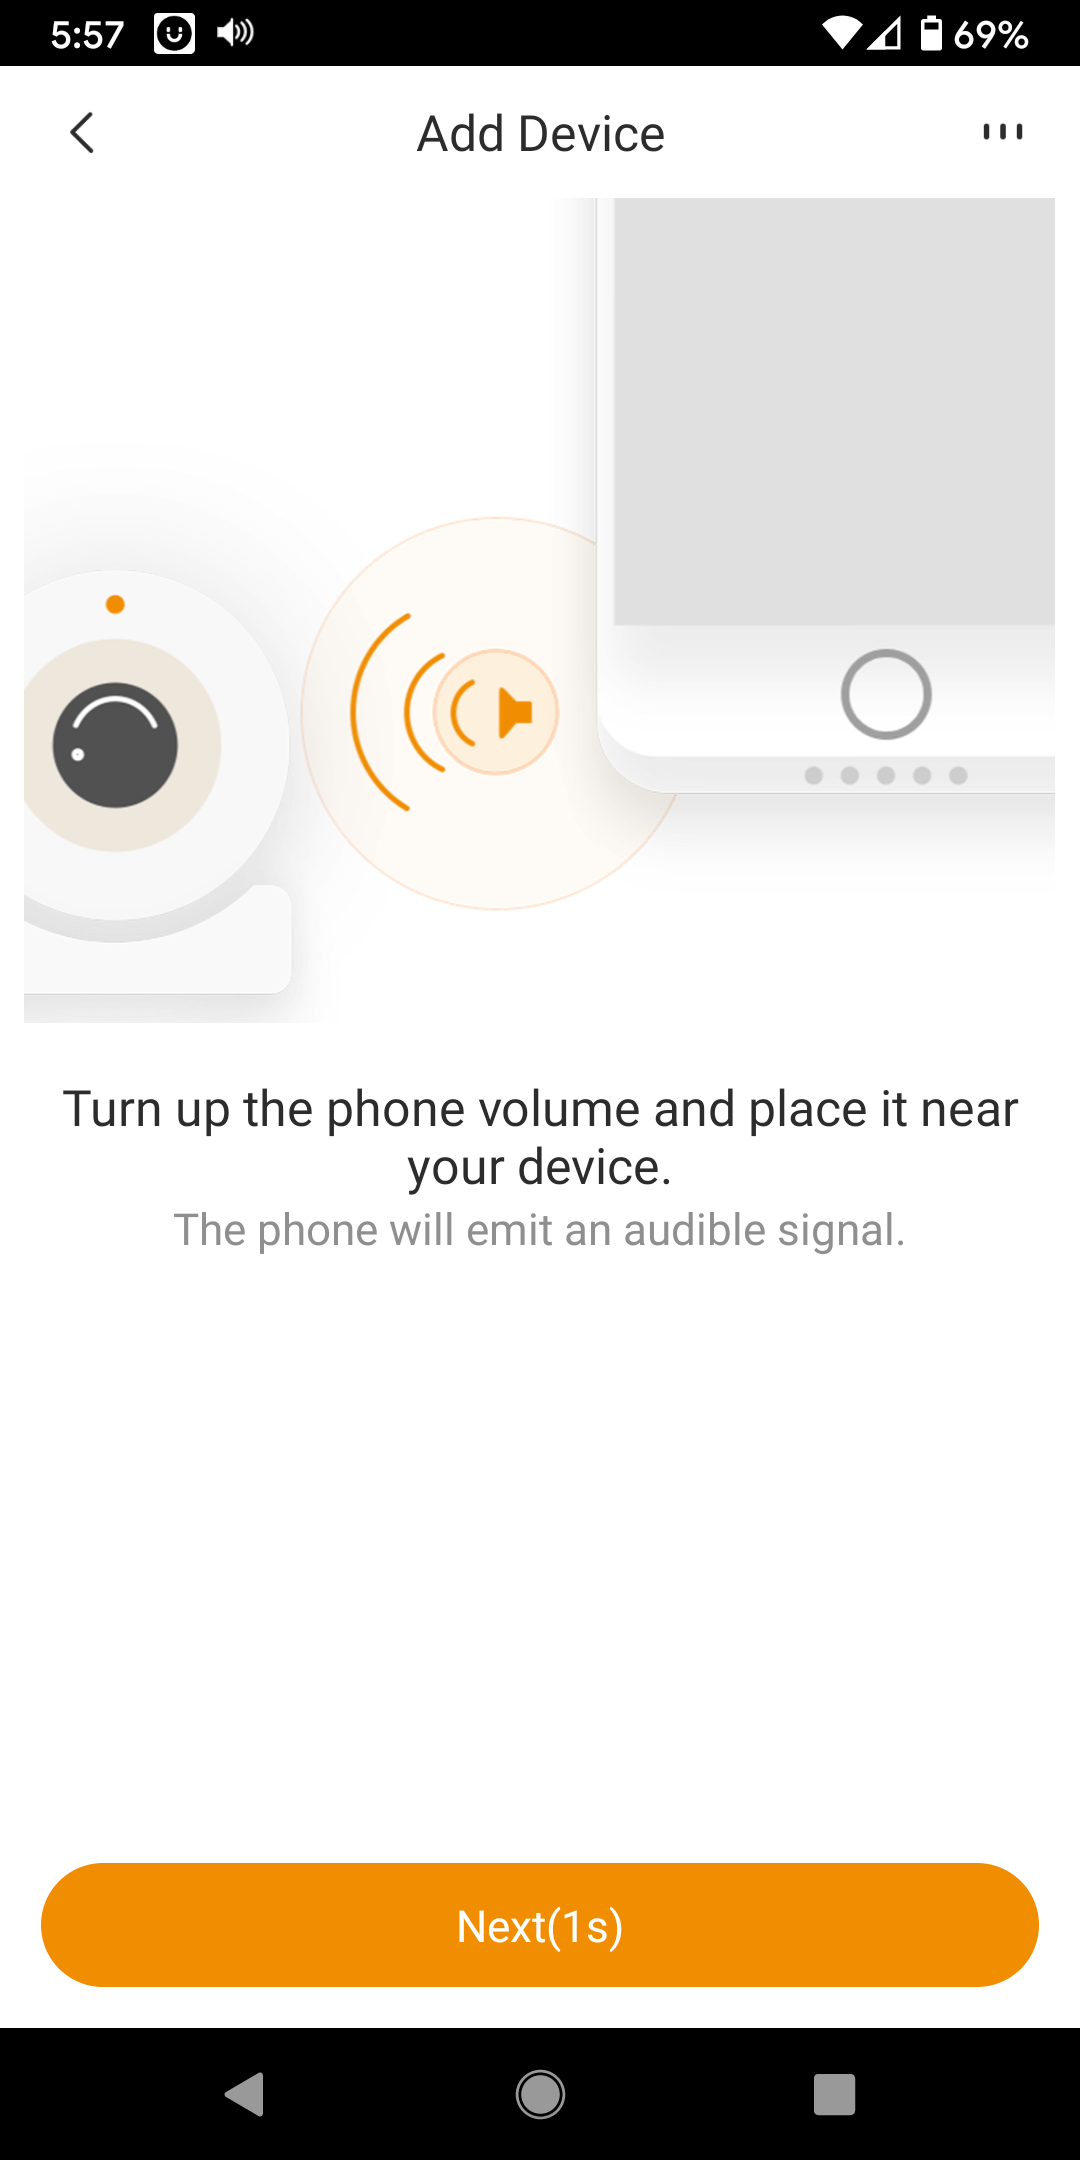
The camera receives the settings:

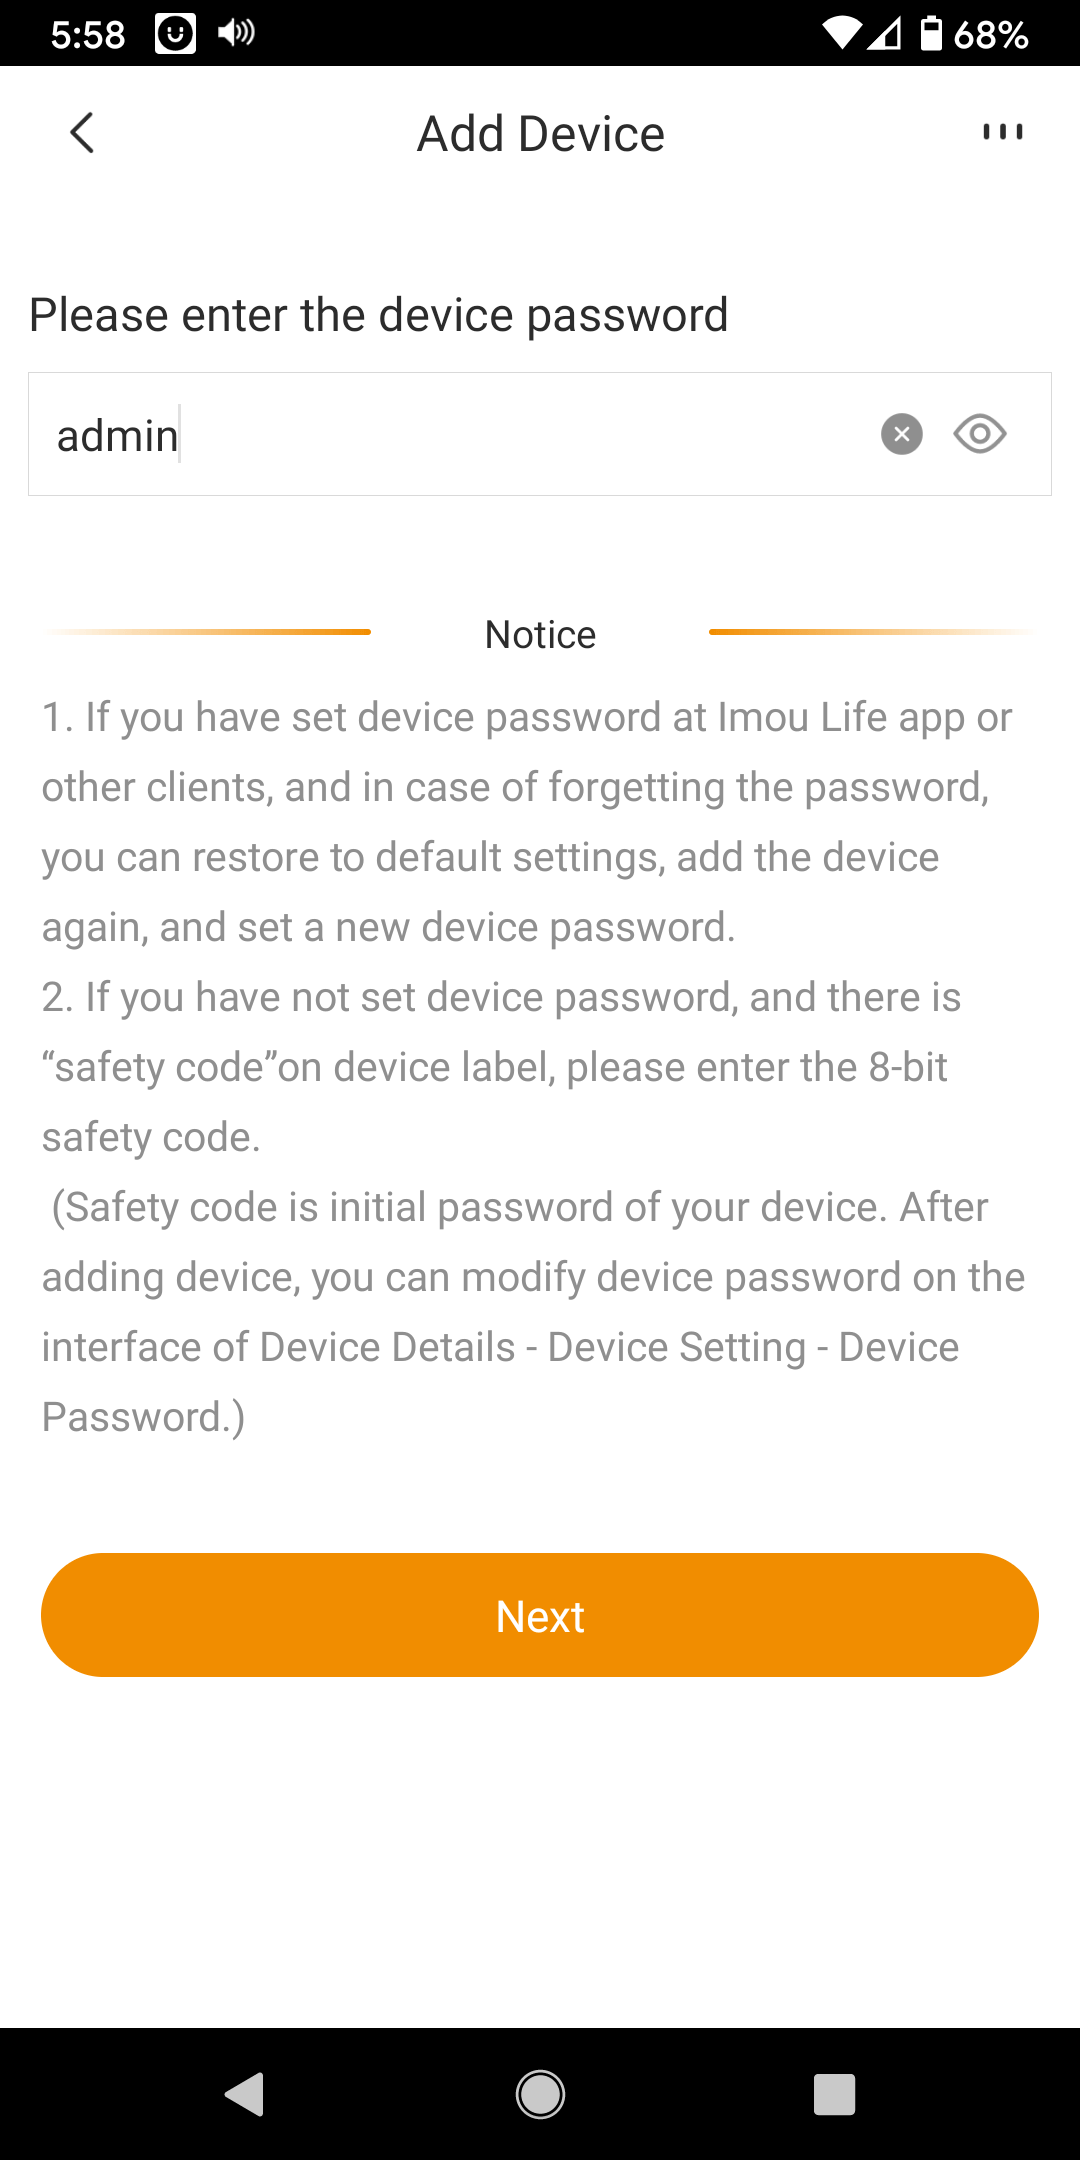
Step 3h: Once completed the app will prompt you to create a device password. The device password is a mechanism to ensure you camera can not be stolen or connected to any one else’s app. This stage is important and we recommend you write this password down. If it is forgotten your camera can’t be reconnected or used with a new phone. Many people use the same password as used in your IMOU Life server account setup which works fine although this isn’t necessary. For maximum security it isn’t advisable.
NOTE: For some firmware versions the password is preset to ‘admin’ and you will be prompted to enter the password as per below screen shot. If the device is blank you will be prompted to create a new password.
Enter a password and select ‘Next’. Your device will be updated.
Step 4 – Complete Setup and Use
Step 4a: When complete click on ‘Done’
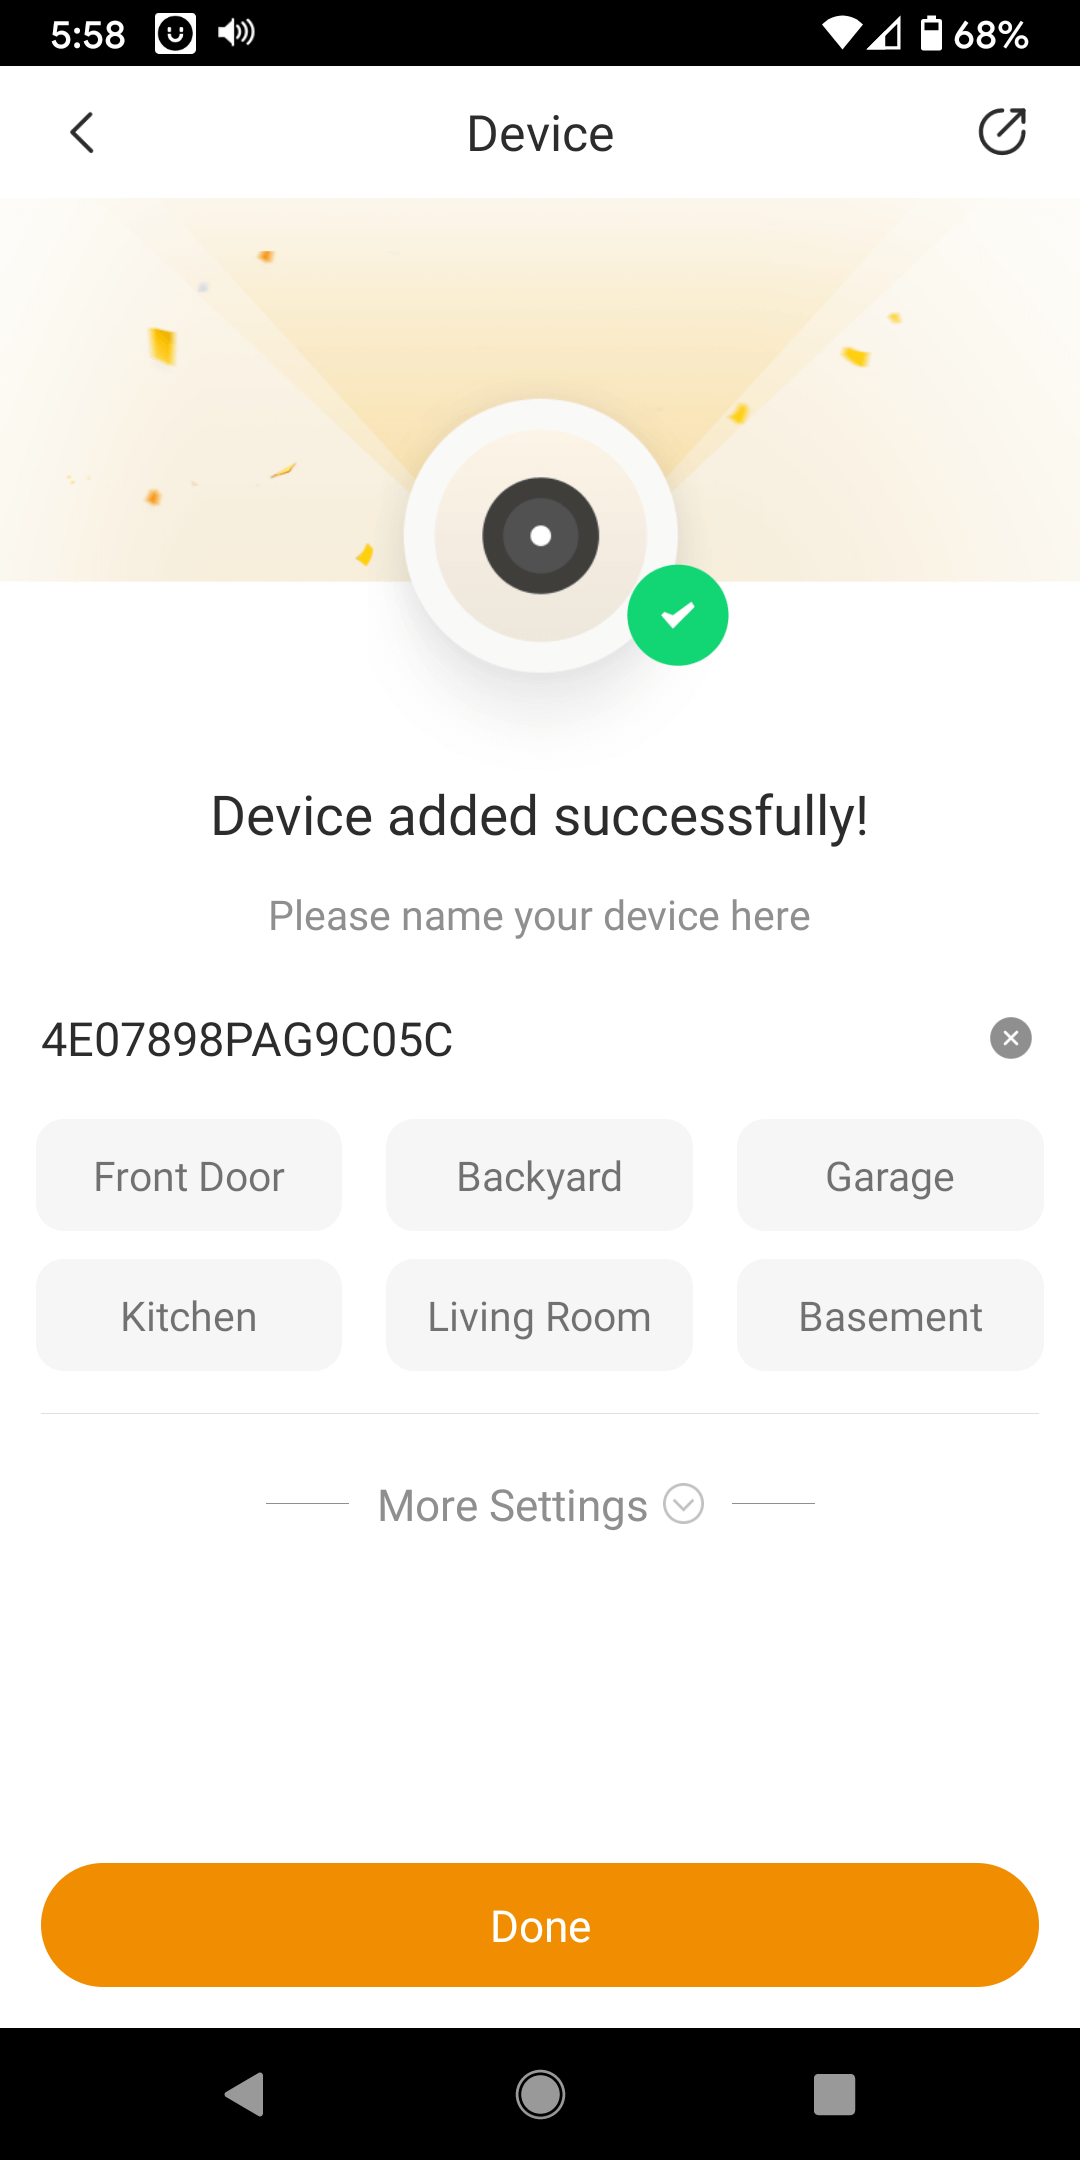
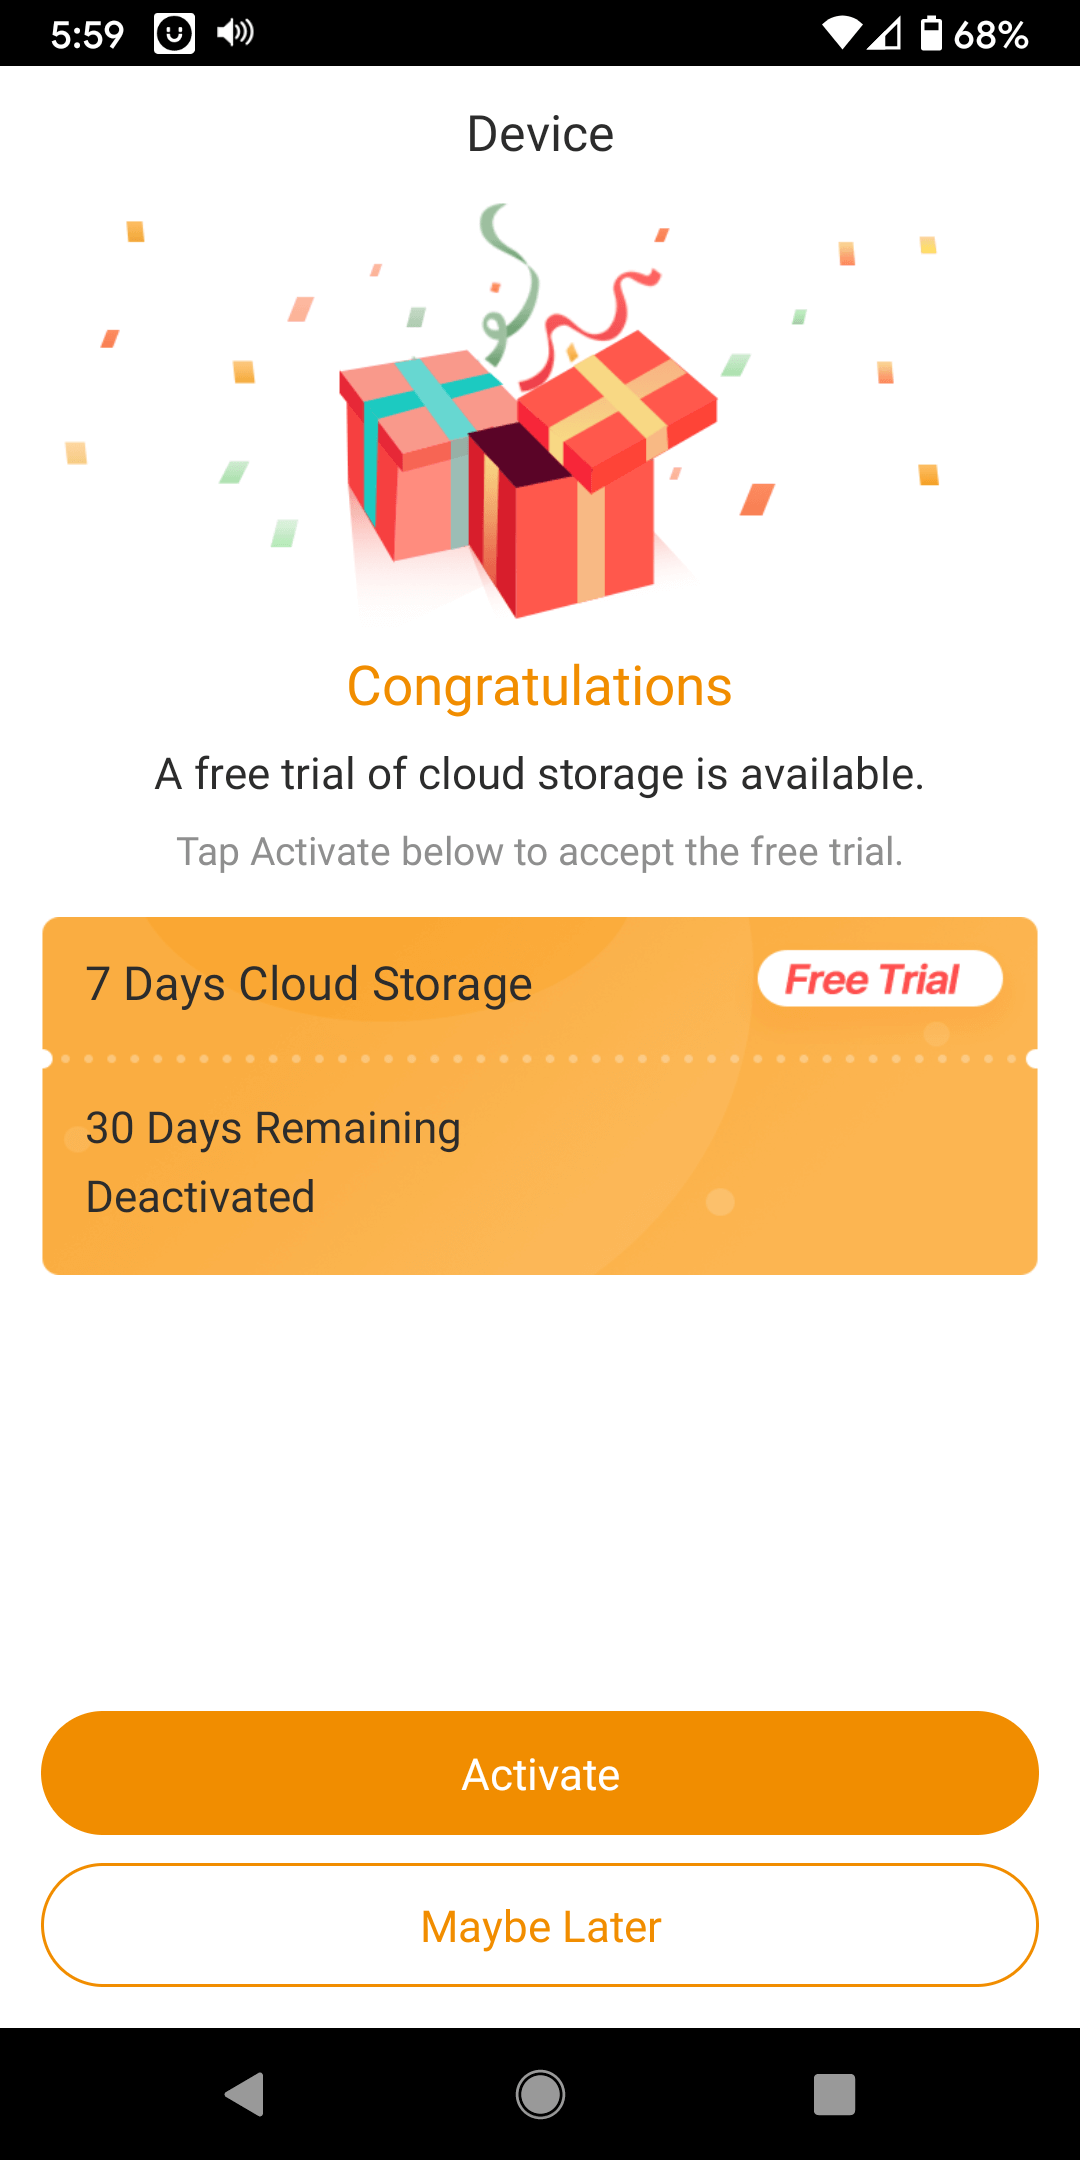
Step 4b: Choose cloud storage trial activate or later option.
The use of the paid external storage cloud is completely optional. If you have a Micro-SD memory chip you can insert this into the camera and video will be archived on the camera itself for post event review. This is often a much cheaper alternative for people and if the most common method to archive video footage for later review. If you would like the video stored away from the property the cloud backup method is the easiest.
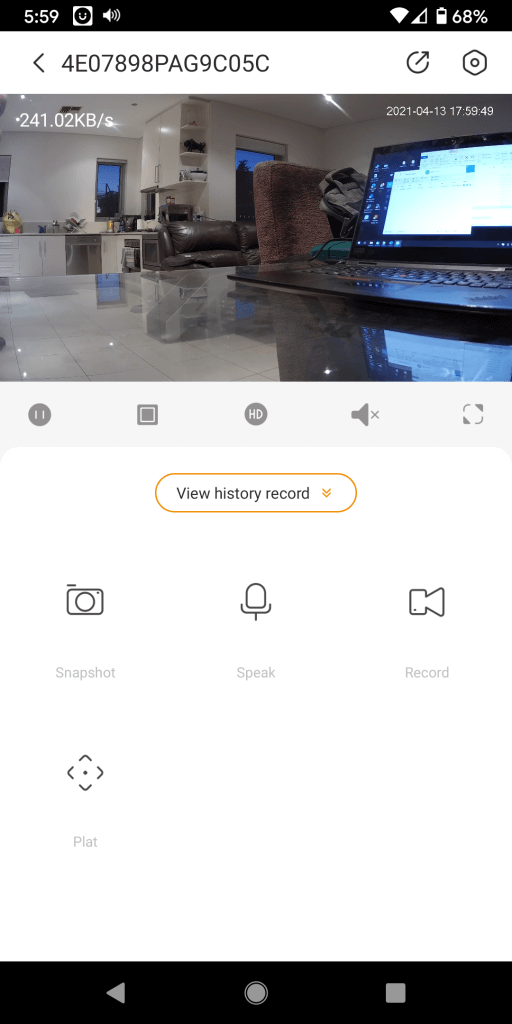
Step 4c: Select the ‘Play’ to operate your camera
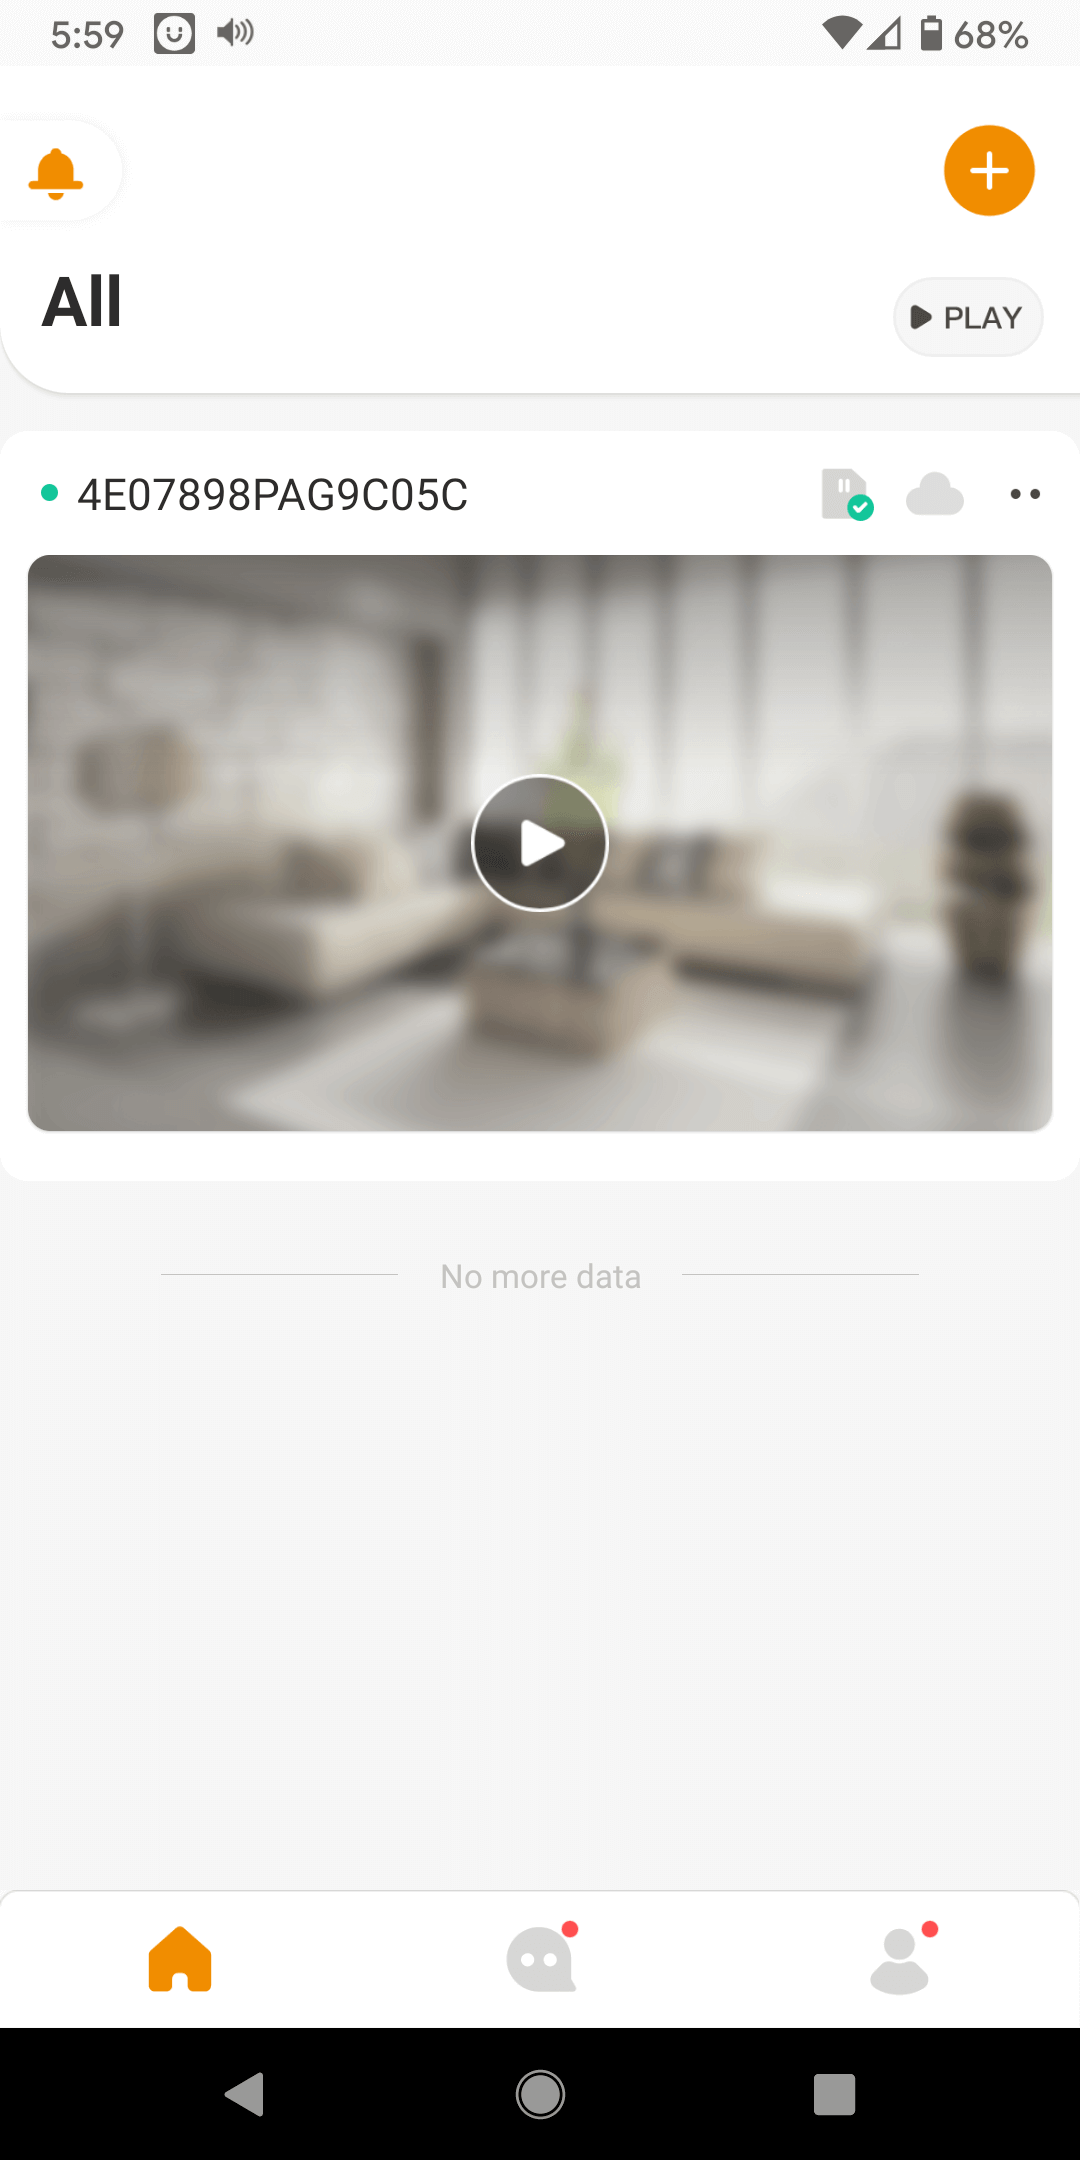
Step 4d: Experiment with the App to learn its features and operation